Find your perfect sparkle
With 150+ colours it's easy to be spoilt for choice. Pick a starting point below and we'll help you narrow it down — by what you're making, the cut, the effect, and the finish you're after.
Narrow it down
Pick a starting point. Each tab gives you a shortlist to match your project.
Start with the project — it rules a lot of options in (and out) straight away.
Resin, gel & glue
Most of our polyester glitters play beautifully in resin, UV gel and glue. Stir it through just before you pour, and always test a small batch for your specific product.
Nail art
Ultra-fine and fine cuts sit flattest on the nail. For polish, choose solvent-resistant colours so they won't bleed; for acrylic and dip, almost anything goes.
Face & body
Use cosmetic-grade glitter only, and patch-test first. Press onto a cosmetic gel or glitter glue, and stop if any irritation occurs.
Candles & wax
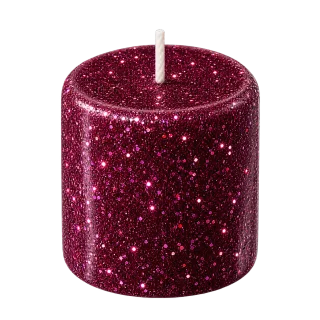
Our glitter candles are surface-decorated for shimmer. Loose glitter is for decorating the outside — it isn't meant to be burned.
Slime & sensory play
Cosmetic-grade or quality craft glitter is kindest here thanks to softer edges. Wash hands after play.
Tumblers & crafts
Go ultra-fine for smooth, gap-free coverage — or reach for chunky mixes when you want the sparkle to be the star.
Cut is the size of each glitter particle. Smaller = smoother and fuller; bigger = more depth and definition.
Microfine & ultra-fine
The fullest, smoothest coverage — individual specks all but disappear. Best for nails, lips and solid glitter backgrounds.
Fine
A full look with a little more definition; you'll catch the odd edge sparkling back at you.
Chunky
You see every piece. Loads of depth and structure, with small gaps between particles.
Mixes & blends
Several cuts (and often effects) in one pot for a layered, festival-ready finish.
The effect is how the glitter plays with light. Mix and match, or keep it to one for a cleaner look.
Metallic
Solid, mirror-bright shine in a single colour.
Laser & holographic
Throws a full rainbow flash as it catches the light.
Iridescent & opalescent
Soft, pearly colour-shift — usually translucent, so the base shows through.
Fluorescent & neon
Punchy, saturated colour; many react under UV and black light.
Glow-in-the-dark
Charges under light, then glows once the lights go out.
Colour-shift
Shifts between colours depending on your viewing angle.
How much of the surface do you want the glitter to fill?
Full coverage
Smallest cuts (≤0.6mm) leave barely any gaps. Great for lips, lids and solid backgrounds.
Standard coverage
0.8–1.5mm reads as fully covered, with a touch more sparkle definition.
Distinct particles
2mm and up when you want to see each piece — depth over density.
Standalone highlights
Large shaped or hex glitters, used sparingly to draw the eye to one spot.
How do you want the colour to behave in the light?
Rainbow reflection
Holographic gives the strongest rainbow; iridescent a softer, pastel version.
Soft colour-shift
Iridescent, pearl and gentle chameleons drift between tones.
Multiple colours
Blends mix several colours in one pot; duochromes carry two on a single piece.
Single, consistent colour
Skip holo, iridescent and chameleon — lean on metallic, matte and neon.
Black-light reactive
Most fluorescents and neons — and many whites — light up under UV.
Think about the surface underneath and how much of it you want to see.
Hide the background
Opaque glitter sits solid and blocks whatever's underneath.
Show the background
Translucent glitter lets the base colour show through the sparkle.
Highlight a colour
Layer several glitters from the same colour family; go easy on mixed effects so the colour stays true.
Cosmetic-grade vs craft — a quick safety note
Anything going on skin, lips or face must be cosmetic-grade — always patch-test first and stop if irritation occurs. Craft-grade glitter is made for resin, candles, tumblers and décor, not the body.
Cut & size guide
A rough guide to how each cut behaves. Sizes are approximate — every colour has its cut listed on its product page.
| Cut | Approx. size | Coverage | Best for |
|---|---|---|---|
| Microfine | 0.1–0.2mm | Fullest, seamless | Lips, eyeshadow, solid backgrounds |
| Ultra-fine | 0.3–0.4mm | Full, smooth | Nails, face & body, resin |
| Fine | 0.6–1.0mm | Full with definition | Crafts, tumblers, general use |
| Chunky | 1.5–2.5mm | Distinct particles | Festival looks, statement pieces |
| Mixes & blends | Varies | Layered | Depth, festival & body decoration |
How to apply body glitter
For skin, always reach for cosmetic-grade glitter and patch-test first.
Choose your base
A cosmetic gel, aloe gel, hair gel or glitter glue all work as a skin-safe base.
Apply a thin layer
Dab the gel onto the area you want to sparkle.
Let it go tacky
Give it a moment — if it's too wet, the glitter will slide.
Press on the glitter
Dab on with a brush or fingertip; wipe the brush if it picks up gel.
Build it up
Repeat until you reach the depth of coverage you want.
Sparkle & go
Show off your shimmer. To remove, lift gently with tape or oil-based cleanser.
Aussie owned
An independent small business.
Ships from Melbourne
Dispatched in 1–2 business days.
150+ colours in stock
Glitter, nail dip powders & candles.
Still can't decide?
Browse the full range and filter by colour, cut and effect — or send us a message and we'll point you to the perfect sparkle.